Me and make-up have a very relative relationship. I mean the make-up keeps building up from one or two products to many and then a lot of them.
I mean lets say I buy a kohl pencil once, after using it for some time I would realize that it does not look good on me. Then, in order to look better, I would end up buying a mascara in black shade too. Once, the duo do an effect on my face, I would end up turning the effect into a smoky one by buying and using eye shadows in shimmering black dust. Once that gets in order, I would move on to other effects too, for example an Indigo child look; Pastel pallet; shimmery gold effect and what not.
Though all these make up tools and wands make me look pretty, but they all together end up adding a good sizable junk on my dresser. Even when all these make up stuff remain scattered on my dressing table, things remain manageable. But it all gets out-of-control when I travel; obviously I end up traveling with a mess carrying all the make-up as it is in my strolley. I normally throw everything together in a carry bag when I travel, but usually end up missing out on applying that perfect shade of gloss that matches my attire. That happens only because of the cluttered mess that I carry, I am never able to find all my make-up stuff. To get rid of all that, I thought of bringing a little order in my make-up life.
Initially I bought a few store bought toiletry bags to grab all my beauty products, but they actually did not solve my problem. It is because they are mostly made up of fabrics, and therefore lack in providing a sheath to the products stored inside them.
Normally I end up overloading clothes in my luggage and so the pressure from the excess weight causes squelching of my creams and lotions that come in a tube form. This problem of mine always kept me worried during my sporadic travels. I kept trying a lot of products in order to get a solution for this, but to no avail. Finally I had to invent the solution on my own.
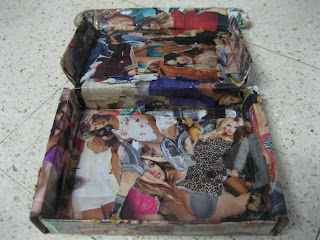
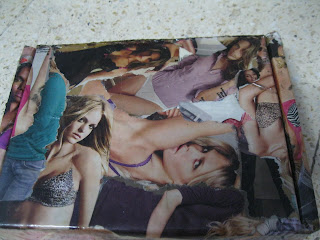
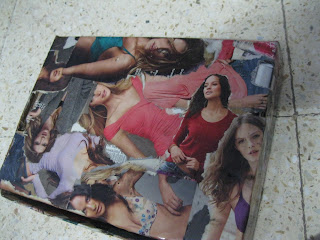
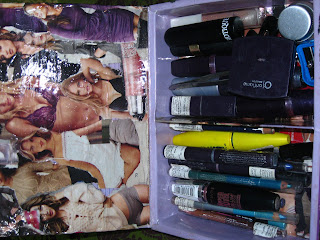
Below are few pictures that show my beautiful solution to the problem.
Technically, these are nothing but strong boxes made of corrugated paper boards. It is fun to realize that some were made to carry Hewlett Packard hard disks in them; but now they hold my precious colour cosmetics. LOL
Now it is indeed fun to carry my belongings in these boxes and the best part is that the contents in the box remain strictly intact. Though it was more fun to make these.
Initially I cut-out a lot of pictures from a glamour magazine. Then pasted them on the box with the decoupage technique. I mean I pasted the pictures once with a white glue; but kept applying a lot of layers of the glue on the already pasted pictures. That created a kind of strength to the box as well as the pictures. Then finally, I kept everything intact with a clear varnish. The enamel not only re-enforces the end product, but also acts as a water proof. Of course, I do not need to mention that the glitter and gloss that it adds to the box is simply remarkable.
I suggest everyone to make at least one. It is not just a wonderful DIY project, but also a wonderful way to recycle magazines and boxes that would be lying in and around your house.
Please find the details for this weekend DIY below:
Things required:
1. Strong box, which should be able to hold your stuff
2. Picture cut outs, preferably glossy ones from a magazine of your choice
3. White glue, I use the one which is non-toxic
4. Clear varnish
5. Paint brush for applying glue and varnish
6. Water
7. a palette knife or any flat knife to ensure smoothness to the pasted pictures
8. a velcro or a magnet finding (in case your box lacks an enclosure medium)
Method :
1. Prepare a thin solution of glue and water. There is no strict rule to this, but I prefer 3 parts of water to 1 of glue. Mix it thoroughly and keep aside. This will serve as the perfect decoupage medium.
2. Try a mock placement of the chosen pictures on the entire surface of the box; inside as well as outside. Please do not worry for the exact array of pictures, as you can overlay one on another.
3. Then apply a layer of water on the rear of each picture and lay it flat on the box. The moisture will help stick the picture cut-outs on the box; though the glue is not used. You would need to do this step quick as the water could dry fast. It would be wise if you could do each side as a project one-by-one instead of altogether pasting pictures on the entire box at one go.
4. Then, apply a thin layer of the decoupage medium on the water-pasted pictures. You will need to wait for 1-2 hours for each pasted side to dry out completely.
5. Repeat the application of decoupage medium on each surface for 2-3 times.
6. Then apply 2 layers of varnish at the end on all the surfaces.
7. Place the velcro or a magnet finding on the opening of the box. Skip this step if your box already has an enclosure within it.
Important Notes:
1. If you using a toxic glue, then work on this project out side your house premises in the open air.
2. Varnish is in itself a harmful product. Stay away from it if you are asthmatic like me. Alternatively you can ask someone else to do it, or you can also try the spray variant. Moreover, you can skip this step. That would reduce the shelf life of the product, but that is not much of a problem, you can make another next year. LOL
3. Be calm in making this DIY project; each surface will take its own time to dry out. Do not attempt to haste in applying layers of decoupage medium, it will only spoil the end product. Wet layers of glue medium will make the product wither in the long run.
4. Use the flat knife to smooth out the pasted pictures. Generally the air bubbles get trapped between the pictures and that causes wrinkles on the end product. Smoothing the pictures with a flat knife helps in giving a professional touch to the end product.
5. Do not use scissors to cut the pictures, instead use hands. This way not only there is justice done to this handmade project, but also it renders a nice outline to the pictures, which looks very attractive.
I would be happy if I get to see more and more people making and using this jewellery box.
I mean lets say I buy a kohl pencil once, after using it for some time I would realize that it does not look good on me. Then, in order to look better, I would end up buying a mascara in black shade too. Once, the duo do an effect on my face, I would end up turning the effect into a smoky one by buying and using eye shadows in shimmering black dust. Once that gets in order, I would move on to other effects too, for example an Indigo child look; Pastel pallet; shimmery gold effect and what not.
Though all these make up tools and wands make me look pretty, but they all together end up adding a good sizable junk on my dresser. Even when all these make up stuff remain scattered on my dressing table, things remain manageable. But it all gets out-of-control when I travel; obviously I end up traveling with a mess carrying all the make-up as it is in my strolley. I normally throw everything together in a carry bag when I travel, but usually end up missing out on applying that perfect shade of gloss that matches my attire. That happens only because of the cluttered mess that I carry, I am never able to find all my make-up stuff. To get rid of all that, I thought of bringing a little order in my make-up life.
Initially I bought a few store bought toiletry bags to grab all my beauty products, but they actually did not solve my problem. It is because they are mostly made up of fabrics, and therefore lack in providing a sheath to the products stored inside them.
Normally I end up overloading clothes in my luggage and so the pressure from the excess weight causes squelching of my creams and lotions that come in a tube form. This problem of mine always kept me worried during my sporadic travels. I kept trying a lot of products in order to get a solution for this, but to no avail. Finally I had to invent the solution on my own.
Below are few pictures that show my beautiful solution to the problem.
 |
| open-storage-box |
 |
| hand-made-storage-box |
 |
| sexy-DIY-storage-box |
 |
| chic-DIY-storage-box |
 |
| my-DIY-make-up-storage-box-on-the-job |
Technically, these are nothing but strong boxes made of corrugated paper boards. It is fun to realize that some were made to carry Hewlett Packard hard disks in them; but now they hold my precious colour cosmetics. LOL
Now it is indeed fun to carry my belongings in these boxes and the best part is that the contents in the box remain strictly intact. Though it was more fun to make these.
Initially I cut-out a lot of pictures from a glamour magazine. Then pasted them on the box with the decoupage technique. I mean I pasted the pictures once with a white glue; but kept applying a lot of layers of the glue on the already pasted pictures. That created a kind of strength to the box as well as the pictures. Then finally, I kept everything intact with a clear varnish. The enamel not only re-enforces the end product, but also acts as a water proof. Of course, I do not need to mention that the glitter and gloss that it adds to the box is simply remarkable.
I suggest everyone to make at least one. It is not just a wonderful DIY project, but also a wonderful way to recycle magazines and boxes that would be lying in and around your house.
Please find the details for this weekend DIY below:
Things required:
1. Strong box, which should be able to hold your stuff
2. Picture cut outs, preferably glossy ones from a magazine of your choice
3. White glue, I use the one which is non-toxic
4. Clear varnish
5. Paint brush for applying glue and varnish
6. Water
7. a palette knife or any flat knife to ensure smoothness to the pasted pictures
8. a velcro or a magnet finding (in case your box lacks an enclosure medium)
Method :
1. Prepare a thin solution of glue and water. There is no strict rule to this, but I prefer 3 parts of water to 1 of glue. Mix it thoroughly and keep aside. This will serve as the perfect decoupage medium.
2. Try a mock placement of the chosen pictures on the entire surface of the box; inside as well as outside. Please do not worry for the exact array of pictures, as you can overlay one on another.
3. Then apply a layer of water on the rear of each picture and lay it flat on the box. The moisture will help stick the picture cut-outs on the box; though the glue is not used. You would need to do this step quick as the water could dry fast. It would be wise if you could do each side as a project one-by-one instead of altogether pasting pictures on the entire box at one go.
4. Then, apply a thin layer of the decoupage medium on the water-pasted pictures. You will need to wait for 1-2 hours for each pasted side to dry out completely.
5. Repeat the application of decoupage medium on each surface for 2-3 times.
6. Then apply 2 layers of varnish at the end on all the surfaces.
7. Place the velcro or a magnet finding on the opening of the box. Skip this step if your box already has an enclosure within it.
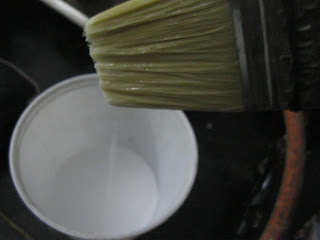 |
| runny-decoupage-solution |
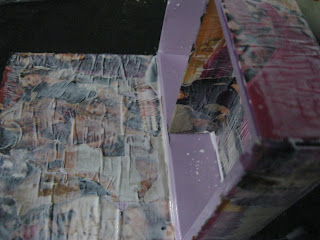 |
| first-layer-of-decoupage-medium |
 |
| second-layer-of-decoupage-medium |
Important Notes:
1. If you using a toxic glue, then work on this project out side your house premises in the open air.
2. Varnish is in itself a harmful product. Stay away from it if you are asthmatic like me. Alternatively you can ask someone else to do it, or you can also try the spray variant. Moreover, you can skip this step. That would reduce the shelf life of the product, but that is not much of a problem, you can make another next year. LOL
3. Be calm in making this DIY project; each surface will take its own time to dry out. Do not attempt to haste in applying layers of decoupage medium, it will only spoil the end product. Wet layers of glue medium will make the product wither in the long run.
4. Use the flat knife to smooth out the pasted pictures. Generally the air bubbles get trapped between the pictures and that causes wrinkles on the end product. Smoothing the pictures with a flat knife helps in giving a professional touch to the end product.
5. Do not use scissors to cut the pictures, instead use hands. This way not only there is justice done to this handmade project, but also it renders a nice outline to the pictures, which looks very attractive.
I would be happy if I get to see more and more people making and using this jewellery box.
 |
| my-vibrant-hand-made-storage-box |


No comments:
Post a Comment